Ready To Trim Your Sheltie's Ears?
A primer on the basics that you can tweak to get the look you want.
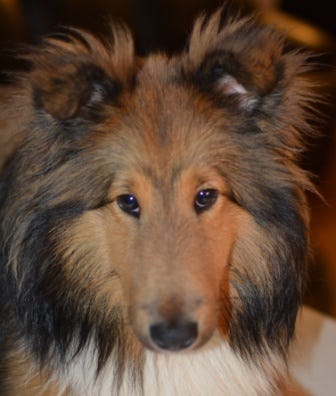
He’s not looking too happy about grooming.
It really isn't difficult grooming ears, but you do need a few tools:
A small pair of thinning shears is best, but a pair of straight scissors can be substituted if necessary.
If you buy shears at the local pet store, I found a long time ago that they didn't cut as much as they just pushed the hair around.
So, I ended up biting the bullet and going for the good stuff. But start at whatever level you feel comfortable. Kenchii is a very good brand and has a tiered system of shears to choose from depending on your budget
Second, a small slicker brush to get all the fine hair around the ears combed in one direction. Chris Christensen has a variety of sizes and shapes to choose from
Third, a spray bottle with plain water or brushing spray to mist the coat. That will keep the “fly-aways” down, allow you to position the hair where you want easily and minimize hair breakage. Here are a few I have used and recommend: Ice on Ice spray, ULTRA Ice on Ice, or Just Divine brushing spray,
If you have lots of mats behind the ears (and most shelties do), use a conditioner instead of plain water in order to reduce the knotting. The hair behind the ears is very fine and tends to mat easily. Daily brushing may be necessary. If the mats are too thick you should just use clippers to trim them all off and just start over as the hair grows back in.
Lastly, a clean coat. Cutting a dirty coat can dull your scissors quicker than clean. Yes, you will have to have your shears sharpened from time to time.
Let's Begin Trimming Those Dogs Ears!
Step 1
Hold the ear out to the side Yoda style and brush the coat straight out.
Step 2
Once all this coat is nicely separated from the ruff of the neck, brush the coat on both the outside and inside of the ears towards the front. If you prefer a longer look to the ear hair, just brush the front half of the ear hair forward, leaving the back to hang longer.
Step 3
Gently flip the ear up so your thumb is on the inside.
Using your thumbnail, gently slide your thumb in the direction of the hair you just brushed until you feel the nail slip off the end of the ear leather.
Now you know how close you can get WITHOUT cutting your dogs ears.
This is a good thing.
Step 4
Use your scissors or thinning shears, trimming off pretty close to the edge of the leather in a straight line.
The thinning shears will give it a softer look than straight shears, but either is better than the wacky untrimmed look.
Trimming from the base of the ear out to the tip to prevent accidentally snipping his head.
If you end up with a few stray hairs, you can snip them with straight shears.
Step 6
Take the slicker brush and brush the coat in the opposite direction. Again, use your thumbnail to feel for the end of the leather, trimming the other side, not quite as close as the first. (Or, if you like a longer look, omit trimming this side of the ear)
Step 7
Curl the ear around your index finger, holding on to the tip with your thumb. Brush the coat from the back to front, trimming any hair that is longer than the height of the ear.
Step 8
Gently press the ears towards the center of the forehead using your thumb.
This gives an approximation of how things will look when the ears are erect.
Time for trimming any obviously long, out of place hairs.
(Notice the look I'm getting from Henry, LOL!)
If the hair in front of the ear is long that also can be trimmed, but Henry's is short enough as it is.
Step 9
Reward your pup for a good job and begin on ear #2. Repeat the process
Step 10
Reward yourself for a good job.
Stare at your dog’s ears suspiciously for many days looking for where extra snips need to be done. ;)
A happier Henry, now that it's all over... or is it??
Trimming dogs ears isn’t difficult. The hard part is making them both look the same J
So how did you do? If it really isn't your cup of tea, I'd be happy to do the grooming for you including trimming those crazy dogs ears. Just give me a call.